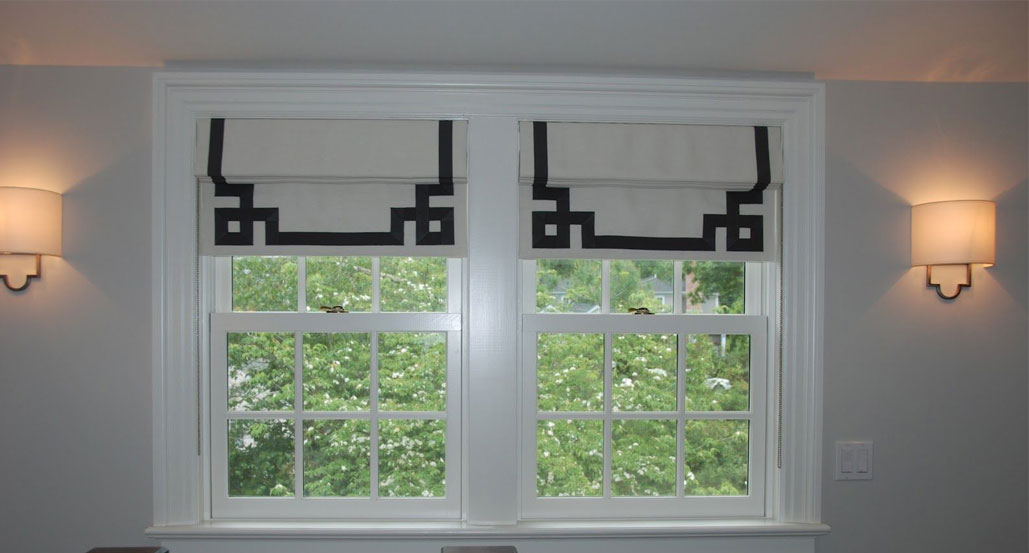
Take it up a Notch With a Roman Shade.
When I am helping a client decide what type of window treatment would look best in the setting and we decide on a roman shade that is just the beginning. To state you want a roman shade is just not that simple. There are many factors to consider when ordering a roman shade.
Here is a checklist of questions that have to be answered. After reading the checklist an explanation of those options will follow.
- Do you want the shade to be an inside mount so the decorative molding around the window can be seen?
- Do you have the space for an inside mounted shade?
- Do you have a window with a crank system?
- Do you want the shade to be an outside mount to create more light blockage?
- How much space do you have to the left and right of the window? (This will help determine the width of the outside mounted shade).
- How much space do you have above the window. (This will help determine the length of the outside mounted shade).
- Do you want the shade to be light filtering or room darkening?
- Do you want the bottom of the shade to be squared off or do I want to create a shape on the bottom?
- Do you want to add a decorative tape on the shade?
- Do you want the tape to make a pattern on the shade or simply go down the sides and/or across the bottom.
How far from the edge do you want the trim placed?
Do you want to add a band on the shade?
What type of operating device do you want?
How long do you want the cord or loop to be on my shade?
Do you want a valance on the shade? ….then the questions begin all over again for all the details on the valance.
With every decision above you make it opens or closes a door for the next decision to be made. The depth of the window creates its own unique set problems. So lets start there.
If you have less than an inch for installation of your roman shade an inside mounted shade is not for this window. The minimum board depth that a shade can be mounted onto is a 1” x 1”. Then the fabric is wrapped onto the board and the thickness of fabric makes the 1 x 1 just a bit thicker. If your window is less than 1” in depth then the board of the shade will project out past the molding of your window. This is when you have to opt for an outside mounted shade.
If you have a window crank when the shade is in the down position the crank will impede the shade from hanging properly. Cranks can be removed but the holding device for the crank may still present a problem.
Some choices you have for operating devices are the traditional cord that is tied off on the wall with a cord cleat is one way to operate a shade. Another way is to have a cord lock system put onto the shade. This is where you pull the cord to one side to lock and pull to the other side to release.
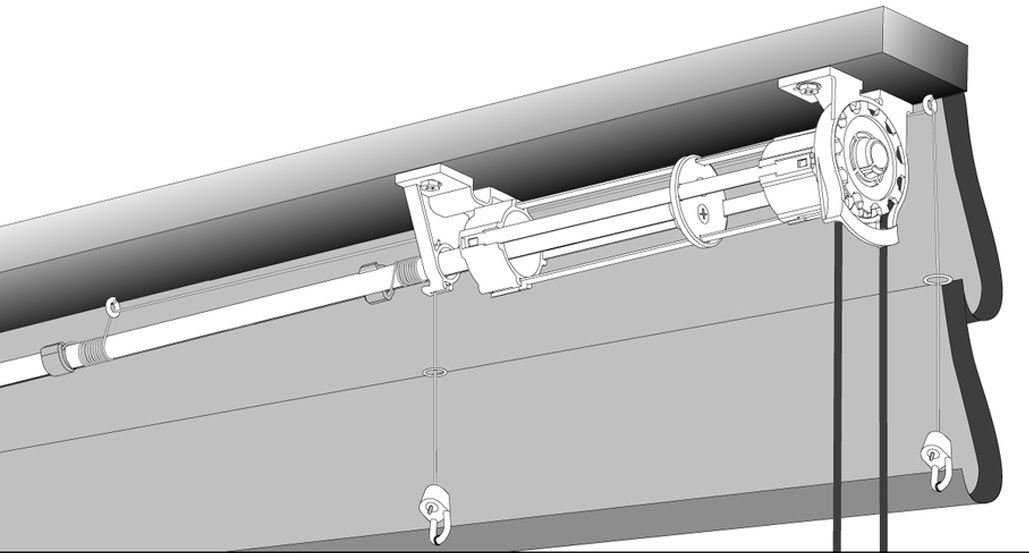
Roll Ease is another operating option for a roman shade but the depth of the window has to be considered. If you are wanting a Rollease system the depth of your window needs to be at a minimum of 2 ½”. A Rollease system is a continuous cord or chain that is a loop and you rotate that loop to raise and lower your shade. The device requires a minimum of 2 ½” board to mount the system. You decide which side you want the cord to extend from.
If you are doing an outside mounted shade or a shade on a door you might want to consider doing a reverse mounted shade. This means that instead of a shade coming off the front of the board it would now come off the back of the board. This keeps the actual shade closer to the window and eliminates some of the light that creeps around the edges of a shade. It also allows for more privacy. When mounting a shade to the back of a shade it does require grommets to be placed at the top of the shades so that the screw eyes that are needed for the cording of the shade can be installed. This does require a valance to cover the grommets and will also require the cord or loop to be at the front of the shade instead of the back, so this is an element that needs to be thought about.
On an outside mounted shade you have the option of taking the shade out past the window which helps with the creeping of light spilling into a room. Depending once again on your choice of operating devices you may want to consider a reverse mounted shade. Just remember it does have its pros and cons as discussed above.
On an outside mounted shade you can create a taller shade to bring height to a room. You can mount the shade all the way up to the ceiling or just inches above the window. This is one of the benefits to an outside mounted shade. Many times an outside mounted shade will have a valance that takes on the characteristics of the shade that it is to compliment.
The details of trim or banding on a shade is an added feature to think about. If using a print on a shade you might want to add a flange or cord to finish out the bottom of the shade and/or the valance. Tape trims can be added to create a pattern if the tape is flexible enough. The same can be achieved by making a banding from a coordinating fabric. Some things to keep in mind, if a shape is wanted then the fabric or trim has to have suitable qualities to achieve this look properly.
The possibilities are endless and to consider all of the above options and/or restrictions presented by your window and the look you desire can be a challenge. I’ve been working in custom workrooms for 25 years and I’ve encountered most, if not all of the above situations, and feel very confident I can provide you with the outcome you desire without the headaches.


